UEFI HTTPBoot 服务器设置
在 openSUSE 上测试
简介
HTTPBoot 自 UEFI SPEC 2.5 起被加入,旨在取代 PXE 并提供更多功能。实际上,HTTPBoot 的概念与 PXE 类似。它从 DHCP 服务器获取 HTTP URL 开始,并使用 HTTP 协议获取数据。此外,HTTPBoot 还支持 DNS。使用 DNS,固件和启动加载程序可以解析域名,因此可以跨不同域传递一个众所周知的 HTTP URL 来下载镜像,而 tftp (PXE) 仅用于本地网络。本文档提供了设置 HTTPBoot 服务器的 HOWTO。我们还提供了创建支持 HTTPBoot 的虚拟机的说明,以防您没有足够新的物理机。
准备
服务器
HTTPBoot 服务器必须安装至少以下软件包:dhcp-server、apache2(或 lighttpd)和 dnsmasq。
注意:本文档使用 IP 子网 192.168.111.0/24 (v4) 和 2001:db8:f00f:cafe::/64 (v6),并假定服务器 IP 地址为 192.168.111.1(v4) 和 2001:db8:f00f:cafe::1/64 (v6)。如果存在任何冲突,请调整相关设置。
客户端
物理机
在固件中启用 HTTPBoot 取决于供应商。请参阅主板或机器的手册。
虚拟机
要设置具有最新 UEFI 的虚拟机,主机需要 qemu 和 OVMF。OVMF 是 qemu 的 UEFI 实现。为了更好地支持 HTTPBoot,建议使用 ovmf >= r18743。
最新的 OVMF 在 https://build.opensuse.org/package/show/Virtualization/ovmf 上可用
只需安装 qemu-ovmf-x86_64,其中包含 qemu 的固件文件。
操作系统镜像
SUSE Linux Enterprise 自 12-SP3 起开始支持 HTTP Boot,自 15 起支持 HTTPS Boot。对于 openSUSE,您需要 Leap 15.0 或更高版本才能支持 HTTP Boot 和 HTTPS Boot。
网络环境
有很多可能的网络场景。对于初学者,建议从隔离网络开始,以避免破坏物理网络。
主机内的隔离网络
qemu 中有几种网络设置。tap 网络是最佳选择,因为它利用虚拟接口来实现主机和客户机之间的双向通信。只要我们不将虚拟接口桥接到任何真实的接口,它就可以提供一个完全隔离的网络,因此我们的测试 dhcp 服务器不会破坏本地网络。
在此场景中,我们假设主机是 HTTPBoot 服务器,客户机是客户端。
[主机] <--> (tap0) <--> [客户机]
首先,我们设置主机和客户机之间通信的 tap 接口。
# ip tuntap add mode tap user <username> name tap0
如果启用了防火墙,建议将 tap0 添加到“内部”或“信任”区域,以避免端口被阻止。
使用 ip 添加 IP 地址
 # ip link set dev tap0 up
 # ip addr add 192.168.111.1/24 dev tap0
 # ip addr -6 add 2001:db8:f00f:cafe::1/64 dev tap0
如果 ip 抱怨“权限被拒绝”在添加 ipv6 地址时,请尝试使用以下命令为 tap0 启用 ipv6
# sysctl net.ipv6.conf.tap0.disable_ipv6=0
注意:在使用隔离网络时,请记住在服务器配置中将 eth0 替换为 tap0。
物理网络
HTTPBoot 服务器在物理网络中充当正常的 DHCP 服务器,除了提供镜像下载功能。请根据您的网络设置调整以下部分的相关设置。
对于客户端,有两种选择:物理机或桥接虚拟机。
物理机作为客户端
只需查看固件手册或 UI,看看它是否支持 HTTPBoot。
桥接虚拟机作为客户端
如果您没有足够新的机器作为 HTTPBoot 客户端,一种选择是将虚拟机桥接到物理网络。假设主机通过 eth0 连接到网络,我们可以将 eth0 和 tap0 桥接到 br0,然后虚拟机可以通过 br0/eth0 发送/接收数据包。
[主机]--(eth0)<-->(br0)<-->(tap0)--[客户机]
建议使用 YaST 创建和管理 tap 和桥接接口。有关更多信息,请参阅 Leap 文档中的章节 (使用 YaST 管理网络桥接)。
当然,您也可以手动操作 ;-)
首先,创建桥接 (br0) 和 tap
 # ip link add name br0 type bridge
 # ip link set br0 up
 # ip tuntap add mode tap user <username> name tap0
桥接接口
 # ip link set eth0 up
 # ip link set tap0 up
 # ip link set eth0 master br0
 # ip link set tap0 master br0
设置桥接 (br0) 后,配置 br0 上的网络设置,然后主机和客户机都可以访问网络。
配置服务器
DNS服务器
DNS 是可选的,但为您的服务器指定一个众所周知的名称会很好。要设置 DNS 服务器,请将以下行添加到 /etc/dnsmasq.conf
 interface=eth0
 addn-hosts=/etc/dnsmasq.d/hosts.conf
然后,在 /etc/dnsmasq.d/hosts.conf 中创建域名到 IP 地址的映射
 192.168.111.1 www.httpboot.local
 2001:db8:f00f:cafe::1 www.httpboot.local
现在,启动 DNS 服务器。
# systemctl start dnsmasq
注意:UEFI 2.7 更改了 HTTPBoot 的设备路径,并插入了一个 DNS 节点,建议使用 SLE15/openSUSE Leap 15 或更高版本的 shim 引导加载程序,以避免由于额外的 DNS 节点而导致的潜在错误。
DHCPv4 服务器
在设置 DHCP 服务器之前,请记住在 /etc/sysconfig/dhcpd 中指定 DHCP 服务器的接口
 DHCPD_INTERFACE="eth0"
 DHCPD6_INTERFACE="eth0"
然后,DHCP 服务器将仅在 eth0 上提供服务。
在这里,我们将设置一个混合的 DHCPv4 服务器,用于 PXEBoot 和 HTTPBoot。将以下行添加到 /etc/dhcpd.conf
 option domain-name-servers 192.168.111.1;
 option routers 192.168.111.1;
 default-lease-time 14400;
 ddns-update-style none;
 subnet 192.168.111.0 netmask 255.255.255.0 {
   range dynamic-bootp 192.168.111.100 192.168.111.120;
   default-lease-time 14400;
   max-lease-time 172800;
   class "pxeclients" {
     match if substring (option vendor-class-identifier, 0, 9) = "PXEClient";
     next-server 192.168.111.1;
     filename "/bootx64.efi";
   }
   class "httpclients" {
     match if substring (option vendor-class-identifier, 0, 10) = "HTTPClient";
     option vendor-class-identifier "HTTPClient";
     filename "http://www.httpboot.local/sle/EFI/BOOT/bootx64.efi";
   }
 }
在 dhcpd.conf 的示例中,我们首先匹配客户端的标识符,以确定它请求哪种服务。对于 HTTPBoot,DHCPv4 服务器必须在 DHCPOffer 数据包中将 vendor class ID 设置为“HTTPClient”,因为客户端使用它来确定这是否是 HTTPBoot 优惠。
启动 dhcp 守护程序
# systemctl start dhcpd
注意:由于 shim 中的一个错误(*) ,如果您没有设置网关(选项路由器),您可能会看到来自 shim 的“无效参数”。
(*) https://github.com/rhboot/shim/pull/136
DHCPv6 服务器
要设置 DHCPv6 服务器,请将以下行添加到 /etc/dhcpd6.conf
 option dhcp6.bootfile-url code 59 = string;
 option dhcp6.vendor-class code 16 = {integer 32, integer 16, string};
 subnet6 2001:db8:f00f:cafe::/64 {
         range6 2001:db8:f00f:cafe::42:10 2001:db8:f00f:cafe::42:99;
         option dhcp6.bootfile-url "http://www.httpboot.local/sle/EFI/BOOT/bootx64.efi";
         option dhcp6.name-servers 2001:db8:f00f:cafe::1;
         option dhcp6.vendor-class 0 10 "HTTPClient";
 }
首先,我们定义引导 URL 的类型和 vendor class,然后设置详细信息。与 DHCPv4 设置类似,我们必须分配引导 URL。请注意,我们必须在引导 URL 中使用 IPv6 名称。类似于 DHCPv4 中的选项 60,我们必须指定 vendor class。DHCPv6 中的 vendor class 选项由企业编号和 vendor class 数据(长度和内容)组成。HTTPBoot 驱动程序不关心企业编号,因此我们只需使用 0。vendor class 数据的 content 必须是“HTTPClient”,否则客户端将忽略该优惠。
对于较旧的 HTTPBoot 实现,它不遵循 RFC 3315,需要不同的设置,如下所示
 option dhcp6.bootfile-url code 59 = string;
 option dhcp6.vendor-class code 16 = string;
 subnet6 2001:db8:f00f:cafe::/64 {
         range6 2001:db8:f00f:cafe::42:10 2001:db8:f00f:cafe::42:99;
         option dhcp6.bootfile-url "http://www.httpboot.local/sle/EFI/BOOT/bootx64.efi";
         option dhcp6.name-servers 2001:db8:f00f:cafe::1;
         option dhcp6.vendor-class "HTTPClient";
 }
现在启动 DHCPv6 守护程序。
# systemctl start dhcpd6
也可以设置一个同时支持 PXEBoot 和 HTTPBoot 的 DHCP6 服务器。像这样
 option dhcp6.bootfile-url code 59 = string;
 option dhcp6.vendor-class code 16 = {integer 32, integer 16, string};

 subnet6 2001:db8:f00f:cafe::/64 {
         range6 2001:db8:f00f:cafe::42:10 2001:db8:f00f:cafe::42:99;

         class "PXEClient" {
                 match substring (option dhcp6.vendor-class, 6, 9);
         }

         subclass "PXEClient" "PXEClient" {
                 option dhcp6.bootfile-url "tftp://[2001:db8:f00f:cafe::1]/bootloader.efi";
         }

         class "HTTPClient" {
                 match substring (option dhcp6.vendor-class, 6, 10);
         }

         subclass "HTTPClient" "HTTPClient" {
                 option dhcp6.bootfile-url "http://www.httpboot.local/sle/EFI/BOOT/bootx64.efi";
                 option dhcp6.name-servers 2001:db8:f00f:cafe::1;
                 option dhcp6.vendor-class 0 10 "HTTPClient";
         }
 }
还可以进一步匹配不同架构的 vendor-class。例如,“HTTPClient:Arch:00016”表示 x86_64 HTTPBoot 客户端,可以将其重写为
         class "HTTPClient" {
                 match substring (option dhcp6.vendor-class, 6, 21);
         }

         subclass "HTTPClient" "HTTPClient:Arch:00016" {
                 option dhcp6.bootfile-url "http://www.httpboot.local/sle/EFI/BOOT/bootx64.efi";
                 option dhcp6.name-servers 2001:db8:f00f:cafe::1;
                 option dhcp6.vendor-class 0 10 "HTTPClient";
         }
然后服务器可以同时服务不同的架构。
参考:https://www.mail-archive.com/edk2-devel@lists.01.org/msg14683.html
防火墙
DHCP6 数据包可能由于 SLE/openSUSE Leap 15+ 中的 RP 过滤器而被防火墙丢弃。如果您在防火墙日志中看到“rpfilter_DROP”,请编辑 /etc/firewalld/firewalld.conf
IPv6_rpfilter=no
TFTP 服务器(可选)
如果需要同时支持 PXE 和 HTTPBoot,则需要一个 tftp 服务器。只需安装 tftp 并启动服务
 # systemctl start tftp.socket
 # systemctl start tftp.service
openSUSE/SLE 现在提供一个特殊的软件包,tftpboot-installation,用于 PXE。例如,只需安装 tftpboot-installation-openSUSE-Tumbleweed-x86_64 并将整个目录复制到 tftp 根目录。
# cp -r /usr/share/tftpboot-installation/openSUSE-Tumbleweed-x86_64 /srv/tftpboot
有关更多信息,请阅读 /usr/share/tftpboot-installation/openSUSE-Tumbleweed-x86_64/README。
HTTP 服务器
对于完整的 SLE/openSUSE HTTPBoot 安装,将第一个 iso 镜像中的每个文件复制到 /srv/www/htdocs/sle/ 或 /srv/www/htdocs/opensuse/。然后,编辑 /srv/www/htdocs/sle/EFI/BOOT/grub.cfg 以适应您的需求。grub.cfg 的一个示例
 timeout=60
 default=1

 menuentry 'Installation IPv4' --class opensuse --class gnu-linux --class gnu --class os {
   set gfxpayload=keep
   echo 'Loading kernel ...'
   linuxefi /sle/boot/x86_64/loader/linux install=http://www.httpboot.local/sle
   echo 'Loading initial ramdisk ...'
   initrdefi /sle/boot/x86_64/loader/initrd
 }

 menuentry 'Installation IPv6' --class opensuse --class gnu-linux --class gnu --class os {
   set gfxpayload=keep
   echo 'Loading kernel ...'
   linuxefi /sle/boot/x86_64/loader/linux install=http://www.httpboot.local/sle ipv6only=1 ifcfg=*=dhcp6,DHCLIENT6_MODE=managed
   echo 'Loading initial ramdisk ...'
   initrdefi /sle/boot/x86_64/loader/initrd
 }
SLE 部署指南(*) 可能会提供有关安装服务器设置的更多信息。
(*) https://www.suse.com/documentation/sles-12/book_sle_deployment/data/part_installserver.html
lighttpd
为了使 lighttpd 同时支持 IPv4 和 IPv6,需要编辑 /etc/lighttpd/lighttpd.conf
 ##
 ## Use IPv6?
 ##
 #server.use-ipv6 = "enable"
 $SERVER["socket"] == "[::]:80" {  }
当启用 server.use-ipv6 时,会导致 lighttpd 仅监听 IPv6,因此我们将其移除并添加一个带有默认选项的新 IPv6 部分。
启动 lighttpd 守护进程
# systemctl start lighttpd
apache2
启动 apache 守护进程
# systemctl start apache2
HTTP 服务器的 SSL 支持(可选)
TLS 协议自 UEFI 规范 2.5 版本起就已经编写完成,最新的 OVMF 已经支持 HTTPS Boot。为了测试,我们可以使用 openssl 创建一个自签名证书
$ openssl req -newkey rsa:4096 -nodes -keyout server.key -x509 -days 365 -out server.crt
由于我们选择 "www.httpboot.local" 作为我们的域名,请为“通用名称”使用 "www.httpboot.local"。
将证书转换为 DER 格式供客户端使用
$ openssl x509 -in server.crt -outform der -out server.der
请注意,此证书仅用于测试,切勿在生产机器中使用此证书。
将服务器证书注册到客户端固件
在使用 HTTPS Boot 之前,必须在客户端注册服务器证书 (server.der),否则客户端将无法连接到服务器。注册服务器证书的方法取决于客户端固件的实现。
物理机
要将服务器证书注册到物理机,可能需要插入包含证书文件的 USB 存储设备,并使用固件 UI 手动注册。另一方面,一些支持 Redfish 的高端服务器可以远程注册证书。例如,HPE iLO5 手册提供了 说明,通过其 Restful API 注册证书。
虚拟机
OVMF 在“设备管理器”->“Tls Auth Configuration”中提供了一个菜单,用户可以从 OVMF 可访问的文件中注册服务器证书。
除了手动注册证书外,还可以使用 "-fw_cfg" 为 OVMF 配置受信任的证书。自 9c7d0d49929 以来,OVMF 支持从 fw_cfg 条目读取证书列表,etc/edk2/https/cacerts。证书列表必须采用签名数据库的格式。
使用 efisiglist 创建证书列表
$ efisiglist -a server.der -o certs.db
创建证书列表后,附加以下命令以指定 fw_cfg 条目
$ qemu ... -fw_cfg name=etc/edk2/https/cacerts,file=certs.db
有关更多详细信息,请查看 OVMF README 的“HTTPS Boot”部分。
lighttpd
由于 lighttpd 需要私钥和证书在同一文件中,因此我们首先需要将它们统一起来。
$ cat server.crt server.key > server-almighty.pem
将 "server-almighty.pem" 复制到 /etc/ssl/private/。
 # cp server-almighty.pem /etc/ssl/private/
 # chown -R root:lighttpd /etc/ssl/private/server-almighty.pem
 # chmod 640 /etc/ssl/private/server-almighty.pem
然后,检查 /etc/lighttpd/modules.conf 是否在 "server.modules" 部分包含 "mod_openssl"。例如
 server.modules = (
   "mod_access",
   "mod_openssl",
 )
注意:由于打包方式的更改,openSUSE Leap 15.0 或更高版本需要显式启用 openssl 模块,而 openSUSE Leap 42.3 或更低版本在 lighttpd 二进制文件中构建了 openssl 模块。
接下来,将以下行添加到 /etc/lighttpd/lighttpd.conf 中的“SSL 支持”部分
  # For IPv4
  $SERVER["socket"] == ":443" {
      ssl.engine                 = "enable"
      ssl.pemfile                = "/etc/ssl/private/server-almighty.pem"
  }
  # For IPv6
  $SERVER["socket"] == "[::]:443" {
      ssl.engine                 = "enable"
      ssl.pemfile                = "/etc/ssl/private/server-almighty.pem"
  }
重新启动 lighttpd 以激活 SSL 支持。
# systemctl restart lighttpd
apache2
在开始配置 apache 之前,我们必须先检查 /etc/sysconfig/apache2。
apache 的 SSL 支持由 APACHE_SERVER_FLAGS 控制,因此我们必须添加 SSL 标志。
APACHE_SERVER_FLAGS="SSL"
此外,确保 ssl 在 APACHE_MODULES 中。例如
APACHE_MODULES="actions alias auth_basic authn_file authz_host authz_groupfile authz_core authz_user autoindex cgi dir env expires include log_config mime negotiation setenvif ssl socache_shmcb userdir reqtimeout authn_core headers proxy proxy_http proxy_wstunnel"
接下来,将私钥和证书复制到 /etc/apache2/。
 # cp server.key /etc/apache2/ssl.key/
 # chown wwwrun /etc/apache2/ssl.key/server.key
 # chmod 600 /etc/apache2/ssl.key/server.key
 # cp server.crt /etc/apache2/ssl.crt/
创建 ssl vhost 配置文件。
 # cd /etc/apache2/vhosts.d
 # cp vhost-ssl.template vhost-ssl.conf
编辑 /etc/apache2/vhosts.d/vhost-ssl.conf 以更改私钥和证书
 SSLCertificateFile /etc/apache2/ssl.crt/server.crt
 SSLCertificateKeyFile /etc/apache2/ssl.key/server.key
重新启动 apache 以激活 SSL 支持
# systemctl restart apache2
修改 DHCP 配置
最后,请记住在 dhcpd.conf/dhcpd6.conf 中将 "http://" 前缀替换为 "https://" 并重新启动 dhcp 服务器。
 # systemctl restart dhcpd
 # systemctl restart dhcpd6
grub.cfg 中的更改
由于我们为 HTTPS 服务器创建了一个自签名证书,如果在 grub.cfg 中指定 HTTPS url,则 SLE/openSUSE 安装系统可能无法验证证书并拒绝从我们的 HTTPS 服务器下载文件。
有两种可能的解决方案。
1. 添加 ssl.certs=0 以禁用证书验证。例如
linuxefi /sle/boot/x86_64/loader/linux install=https://www.httpboot.local/sle ssl.certs=0
2. 创建包含服务器证书的 initrd。默认情况下,安装系统会在 /var/lib/ca-certificates/openssl/ 和 /var/lib/ca-certificates/pem/ 中搜索受信任的证书,因此我们必须创建一个包含服务器证书的 initrd,将其放在这些目录中。以下是命令示例
 ## Create new directories containing the target path
 $ mkdir -p initrd-new/var/lib/ca-certificates/openssl/
 $ mkdir -p initrd-new/var/lib/ca-certificates/pem/

 ## Copy our server certificate to the target paths
 $ cp server.crt initrd-new/var/lib/ca-certificates/openssl/my-ca.pem
 $ cp server.crt initrd-new/var/lib/ca-certificates/pem/my-ca.pem

 ## Create the link file, <hash>.0, to make the certificate be trusted
 $ ln -sr initrd-new/var/lib/ca-certificates/openssl/my-ca.pem initrd-new/var/lib/ca-certificates/openssl/`openssl x509 -hash -noout -in server.crt`.0
 $ ln -sr initrd-new/var/lib/ca-certificates/pem/my-ca.pem initrd-new/var/lib/ca-certificates/pem/`openssl x509 -hash -noout -in server.crt`.0

 ## Change the working directory to 'initrd-new'
 $ cd initrd-new

 ## Make sure the whole path is owned by root
 $ sudo chown -R root:root var

 ## Create initrd (ssl.img)
 $ find . | cpio --quiet -H newc -o | gzip -9 -n > ../ssl.img

 ## Back to the upper directory for the further actions
 $ cd ..
您可以使用 lsinitrd 检查 ssl.img 的内容。例如
 $ lsinitrd ssl.img
 Image: ssl.img: 4.0K
 ========================================================================
 Version:

 Arguments:
 dracut modules:
 ========================================================================
 drwxr-xr-x   3 johndoe  users           0 Sep  3 10:09 .
 drwxr-xr-x   3 root     root            0 Sep  3 16:27 var
 drwxr-xr-x   3 root     root            0 Sep  3 16:27 var/lib
 drwxr-xr-x   3 root     root            0 Sep  3 16:27 var/lib/ca-certificates
 drwxr-xr-x   2 root     root            0 Sep  3 16:28 var/lib/ca-certificates/openssl
 lrwxrwxrwx   1 root     root            9 Sep  3 16:28 var/lib/ca-certificates/openssl/c6bea024.0 -> my-ca.pem
 -rw-r--r--   1 root     root         2114 Sep  3 16:28 var/lib/ca-certificates/openssl/my-ca.pem
 drwxr-xr-x   2 root     root            0 Sep  3 16:28 var/lib/ca-certificates/pem
 lrwxrwxrwx   1 root     root            9 Sep  3 16:28 var/lib/ca-certificates/pem/c6bea024.0 -> my-ca.pem
 -rw-r--r--   1 root     root         2114 Sep  3 16:28 var/lib/ca-certificates/pem/my-ca.pem
 ========================================================================
现在我们需要将 ssl.img 复制到 initrd 的目录,例如 /srv/www/htdocs/sle/boot/x86_64/loader/,并修改 grub.cfg 以添加 ssl.img。例如
 echo 'Loading kernel ...'
 linuxefi /sle/boot/x86_64/loader/linux install=https://www.httpboot.local/sle
 echo 'Loading initial ramdisk ...'
 initrdefi /sle/boot/x86_64/loader/initrd /sle/boot/x86_64/loader/ssl.img
注意:有一个简单的 bash 脚本可以创建 initrd:https://github.com/lcp/uefi-fun/blob/master/packcert/packcert.sh
用法
$ sh packcert.sh server.crt ssl.img
容器服务
为了快速测试,mightyboot(*) 可以使用容器创建服务。只需编辑 env 以匹配主机网络配置和类型
$ docker-compose up
如果设置正确,它将在给定的网络接口上启动 dhcp、dhcp6、dnsmasq 和 lighttpd 服务,并使其准备好进行测试。
(*) https://github.com/lcp/mightyboot
启动客户端
物理机
如果固件已经支持 HTTPBoot,只需插入电缆并选择正确的启动选项即可。
虚拟机
现在是时候设置一台虚拟机作为 HTTPBoot 客户端了。创建 UEFI 虚拟机需要几个 qemu 选项。
- 指定固件
 -drive if=pflash,format=raw,readonly,file=/usr/share/qemu/ovmf-x86_64-code.bin \
 -drive if=pflash,format=raw,file=ovmf-x86_64-vars.bin
请注意,ovmf-x86_64-vars.bin 必须是可写的。只需将 /usr/share/qemu/ovmf-x86_64-vars.bin 复制到工作目录即可。
- 指定网络设备
 -netdev tap,id=hostnet0,ifname=tap0,script=no,downscript=no \
 -device virtio-net-pci,romfile=,netdev=hostnet0
由于主机使用 tap0 与客户机通信,因此我们必须指定接口。"romfile=" 是为了禁用 iPXE 支持,以便虚拟机将使用 OVMF 而不是 iPXE 中的本机 PXE 和 HTTPBoot 功能。
完整的 qemu 命令如下所示
 $ qemu-system-x86_64 -enable-kvm \
                      -drive if=pflash,format=raw,readonly,file=/usr/share/qemu/ovmf-x86_64-code.bin \
                      -drive if=pflash,format=raw,file=ovmf-vars.bin \
                      -hda fat:hda-contents/ -monitor stdio \
                      -netdev tap,id=hostnet0,ifname=tap0,script=no,downscript=no \
                      -device virtio-net-pci,romfile=,netdev=hostnet0
如果您使用的是 libvirt,则可以使用 "rom bar" 禁用 iPXE 支持。例如
    <interface type='bridge'>
      <mac address='00:11:22:33:44:55'/>
      <source bridge='br0'/>
      <model type='virtio'/>
      <rom bar='off'/>
      <address type='pci' domain='0x0000' bus='0x00' slot='0x02' function='0x0'/>
    </interface>
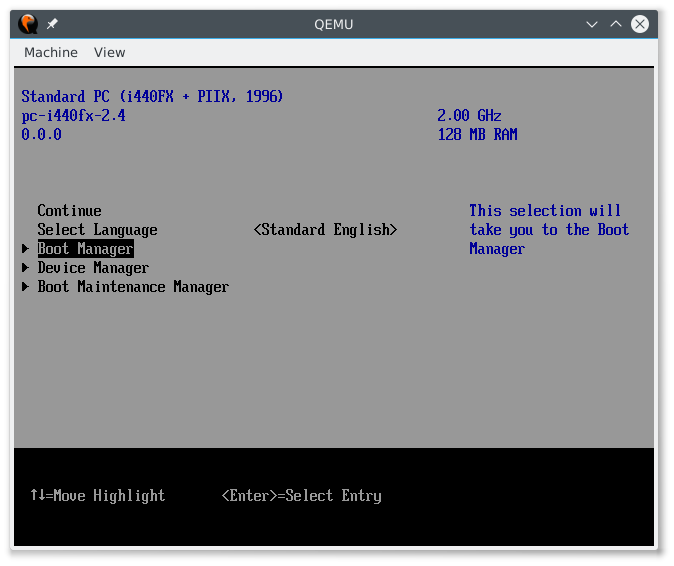
当显示 TianoCore 徽标时,按“ESC”进入固件菜单。
按“DOWN”键进入“启动管理器”并按“Enter”。
将有几个启动选项。选择带有“HTTP”前缀的启动选项。
例如
HTTPBoot IPv4

HTTPBoot IPv6
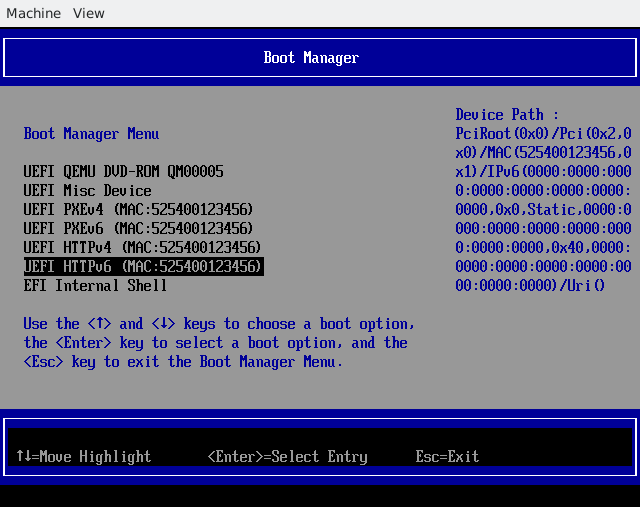
只需选择其中一个启动选项,固件将开始下载您的 UEFI 应用程序并执行它!
另一种测试 http boot 的方法是从 URL 下载 iso 镜像。这种方法的优点是您不需要在主机上设置 DHCP,并且只需要 http 服务器。
第一步是将 iso 文件放在服务器端的 /srv/www/htdocs 中
例如 /srv/www/htdocs/openSUSE-Leap-42.1-NET-x86_64.iso
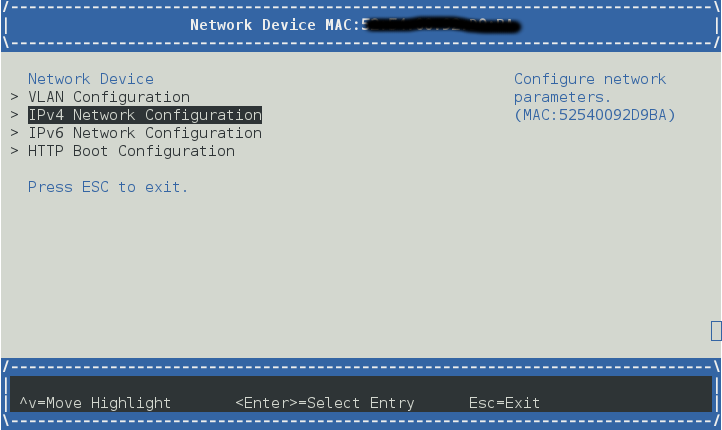
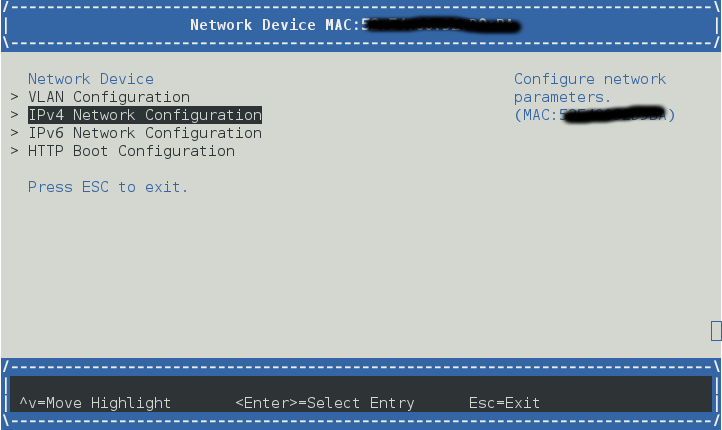
在客户端代码中,您应该启动 UEFI 固件 UI
设备管理器 -> 网络设备列表
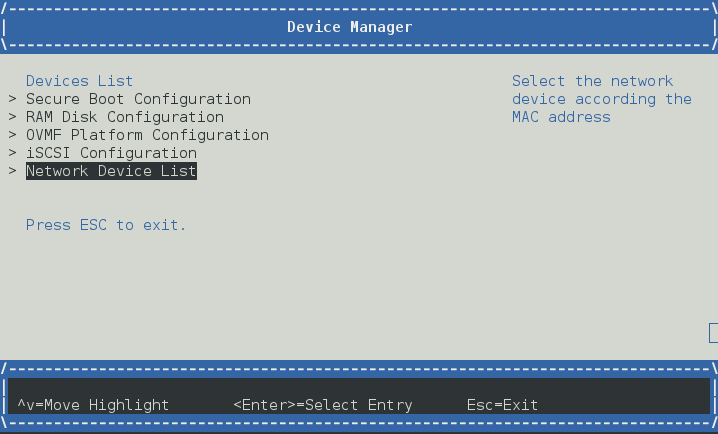
例如 IPv4
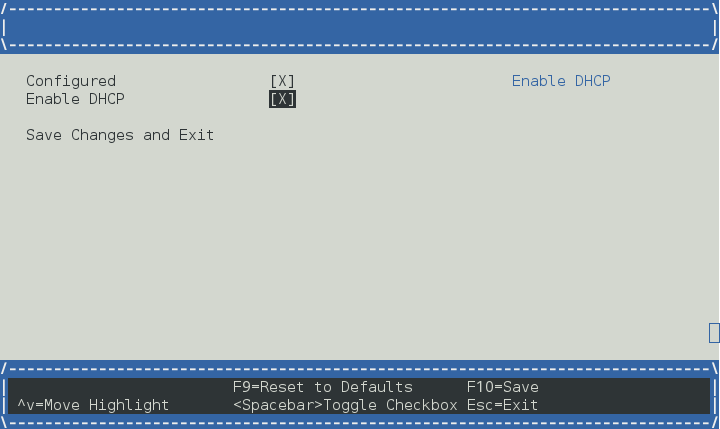
启用 DHCP 或您可以设置静态 ip
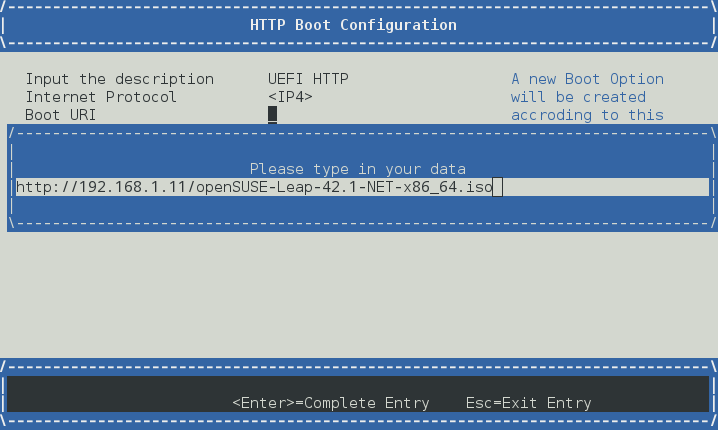
通过“HTTP 启动配置”创建一个启动选项
编辑“启动 URI”,指向 ISO 文件的位置
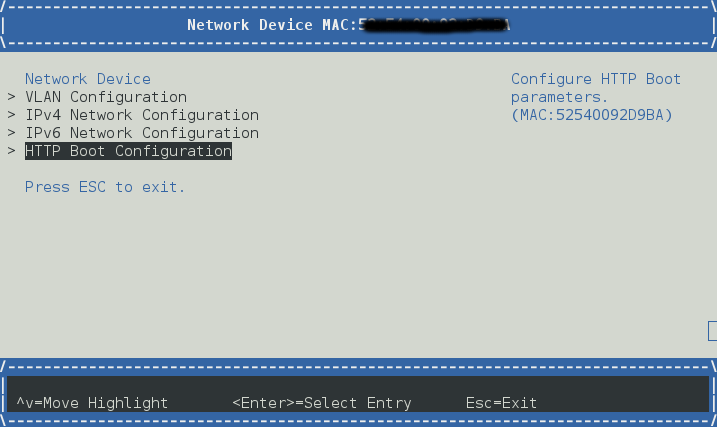
选择“UEFI HTTP”以启动到 ISO 镜像